How to Make Quick Pickles at Home in 24 Hours
If you've ever opened a supermarket jar of pickles only to be greeted by a sad, limp, soggy slice of cucumber, you are not alone. After reviewing dozens of pickles, one thing is clear: high-heat processing and sitting in a shipping container for six months generally doesn't do the humble cucumber any favours.
The good news? Making crunchy, punchy, restaurant-quality pickles at home is completely doable - and you don't need to faff around by boiling jars in a giant stockpot, buying fancy fermenting crocks, or waiting four weeks to eat them.
With quick-pickling (also known as refrigerator pickling), you can slice up fresh cucumbers tonight and be eating crisp, flavour-packed pickles tomorrow.
Quick Pickles vs Fermented vs Heat-Processed: What is the Difference?
Before you grab a chopping board, it helps to understand the three main ways cucumbers end up in a jar across the Pickle Universe:
- Vinegar Pickles (Shelf-Stable): This is how almost all mass-produced supermarket jars are made. The jars are sterilised, then sealed in boiling water baths so they can sit unrefrigerated on shelves for months or even years. Unfortunately, that intense heat cooks the cucumber and destroys its natural crunch.
- Fermented Pickles: These use salt, water, and natural bacteria rather than vinegar to create acidity over several weeks. They develop a complex, funky, sour profile, although they also soften slightly over time.
- Quick Pickles (Refrigerator Pickles): These rely on a warm vinegar brine poured directly over raw cucumbers, then chilled in the fridge. Because the cucumbers are never heat-canned or boiled, they hold onto their natural snap and stay ultra-crunchy.
Step 1: Pick the Right Cucumber
Not all cucumbers are built for brining. If you buy the wrong variety at Coles or Woolworths, you'll end up with mush no matter how good your recipe is.
- The Winner: Lebanese Cucumbers. These are smallish, dark green, thin-skinned, and packed with tiny seeds. They stay firm in the fridge and fit neatly into a standard 500ml jar when cut into spears.
- The Runner-Up: Baby Cucumbers or "Qukes". These mini cucumbers in a punnet are also great for quick pickling given their low seed count.
- The Ones to Skip: Green (in the plastic wrapping) or Continental Cucumbers (the fatter ones). These cucumbers have high water content and soft flesh, so they turn watery and limp fast in brine.
Pro Crunch Tip: Slice a thin 2mm coin off the blossom end of each cucumber (the lighter, slightly round tip opposite the stem). That end holds natural enzymes that cause pickles to go soft in the jar.
Step 2: Nail the Golden Brine Ratio
A solid quick-pickle brine starts with a simple base formula: equal parts vinegar and water. For a standard 500ml glass mason jar, you'll need:
- 1 cup (250ml) white vinegar or apple cider vinegar (white vinegar gives a clean, sharp bite; apple cider vinegar adds a slightly fruitier, warmer note)
- 1 cup (250ml) water
- 1 tbsp of salt
Step 3: Get the Spice Balance Right (The Tricky Part)
Anyone can boil vinegar and water, but balancing the spices is where most homemade batches go wrong. Too much clove or allspice makes the jar taste like Christmas pudding; too little mustard seed or dill leaves them tasting like plain sour water.
To build a proper gourmet flavour profile from scratch, you typically need to buy a whole bunch of separate jars from the supermarket spice aisle, particularly if you want to experiment with different flavours. Common spices include black or yellow mustard seeds, dill seeds or tips, coriander seeds, garlic flakes, onion flakes, black peppercorns, chilli flakes, and turmeric; the list is endless really - but in our experience, the generic "pickling spice" jar should be avoided!
Step 4: Simmer, Pour, and Chill
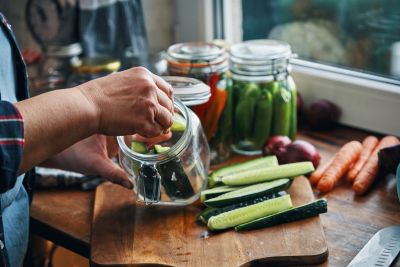
- Pack the jar: Slice your Lebanese cucumbers into spears or thick rounds and pack them tightly into a clean 500ml glass jar. Leave about 1.5cm of headspace at the top.
- Simmer the brine: Add your water, vinegar, salt and spices to a small saucepan. Bring it to a gentle simmer for 2 minutes until the salt dissolves completely.
- Pour it over: Carefully pour the hot brine over the cucumbers until they're completely submerged. Tap the jar gently on the bench to release any trapped air bubbles.
- Wait 24 hours: Let the jar cool to room temperature, screw the lid on tight, and pop it in the fridge. Leave it for at least 24 hours so the brine penetrates right to the centre of the cucumbers.
Keep your jar in the fridge, and your pickles will stay snappy and delicious for up to 2-3 weeks - assuming you haven't eaten them straight out of the jar by day three!
Want to Skip the Spice Aisle? Grab The Pickle Pack
Instead of buying 10 separate spice jars and guessing the ratios, we have already dialled in the exact blends for you.
The Pickle Pack ($34.99 including free Australian shipping) gives you an authentic, reusable 500ml glass mason jar and 3 custom-blended gourmet spice sachets (Dill, Spicy and Sweet) - enough to make 3 full batches at home. Just grab fresh Lebanese cucumbers, vinegar, and water, and get guaranteed crunch every single time.